The “Manage Accounts” feature for Hepsia-managed VPS and dedicated servers has undergone a significant enhancement

Hepsia Control Panel customers on our VPS and dedicated servers have been able to create subaccounts for their own customers for some time now.
As a result of a significant upgrade to the “Manage Accounts” section, server users can now create and manage subaccounts via a new, feature-rich, user-friendly interface.
What are subaccounts about?
With the help of the “Manage Accounts” functionality, server owners can use their server for reseller hosting purposes, which is far beyond typical server management tasks.
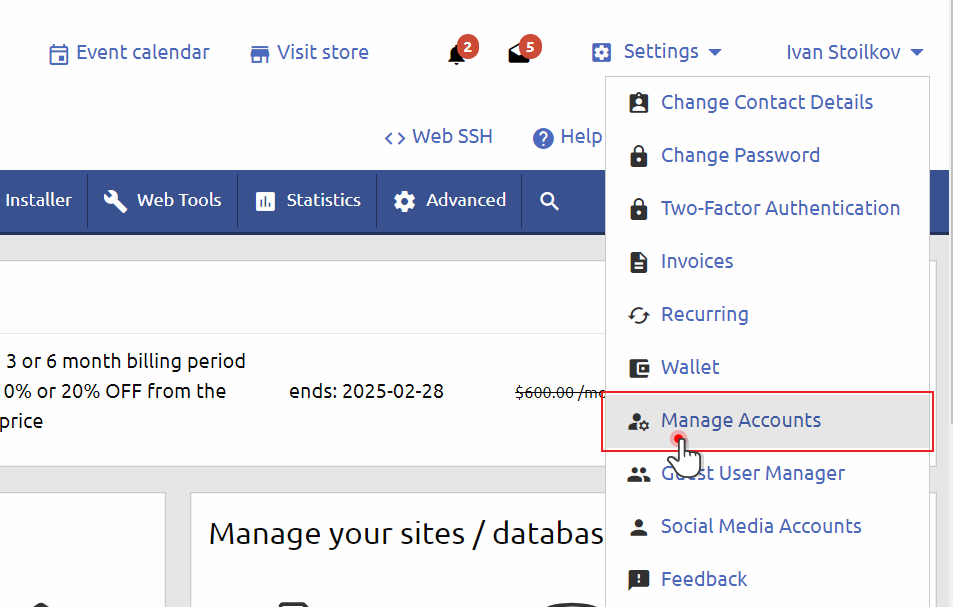
This option is accessible under “Manage Accounts” from the user drop-down menu in the top-right corner of the Hepsia Control Panel:
By default, account owners can create up to 5 separate web hosting accounts with resource allocations of their choice.
Once created, the accounts can be suspended or re-enabled by the server owner like with other popular web hosting management solutions such as WHM.
Users can sell these accounts to their customers using a client management & billing software of their preference.
In addition to client management and billing, server owners are also responsible for providing support to their own customers.
Up until now, the process of creating and managing accounts has been done via just a few controls.
However, with the recent upgrade to the subaccounts functionality, account owners now have access to a convenient interface that enables them to accomplish various account management tasks with a few simple, point-and-click actions.
What is the new “Manage Accounts” upgrade about?
With the new upgrade, the existing subaccounts section has been completely reworked, adding a number of new features for managing subaccounts, as follows:
A brand new package manager section
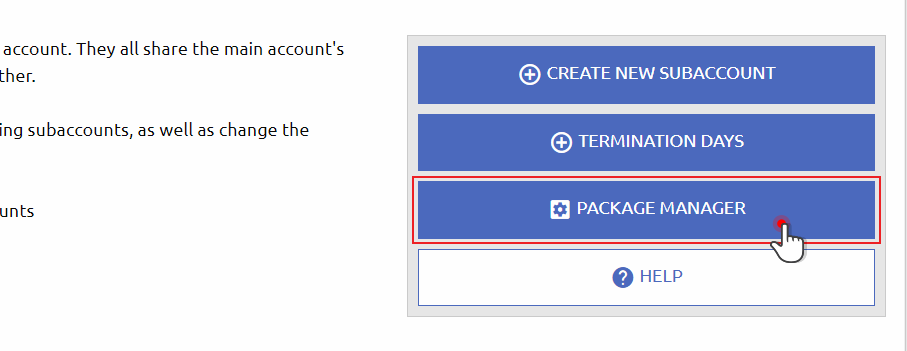
The new Package Manager button on the right provides users with access to a package setup area where they can configure web hosting packages according to their product strategy:
Creating a new package is pretty straightforward – just specify the package’s name and then select its features using the drop-down options on the right:

Packages created by the account owner will appear in a neat table showing the number of users the package is assigned to, as well as the option to edit the package’s features or delete it if no longer needed:

An option to assign a particular web hosting package to a specific user
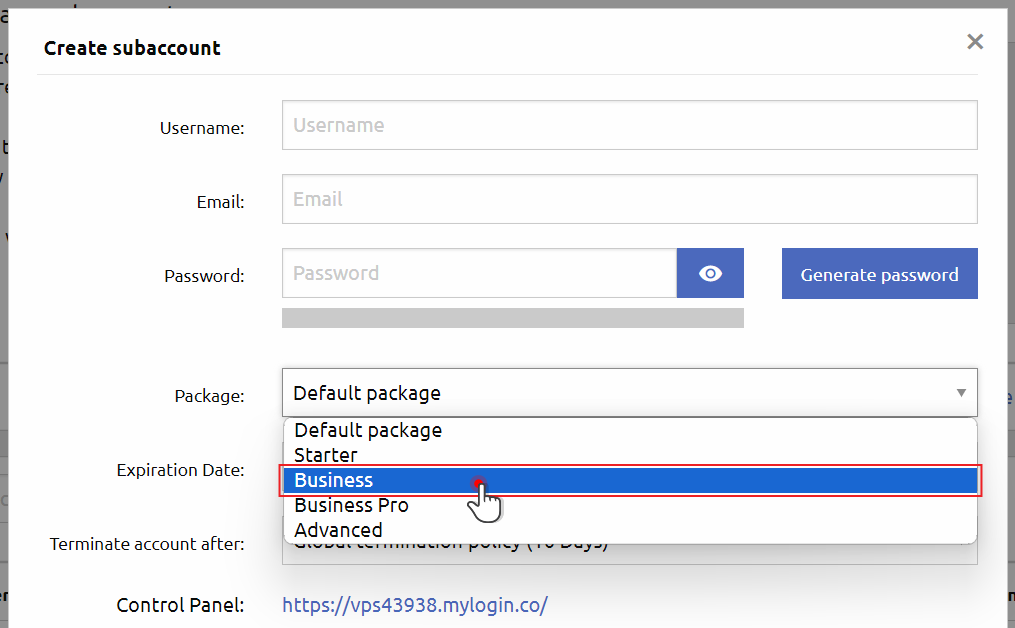
By using the “Create new subaccounts” button on the right, the account owner can create new subaccounts for their customers with their details and assign them a specific package:
All subaccounts created by the account owner will be listed in the table below.
The table features basic subaccount details such as username, email, package, creation and expiration dates, as well as account status:
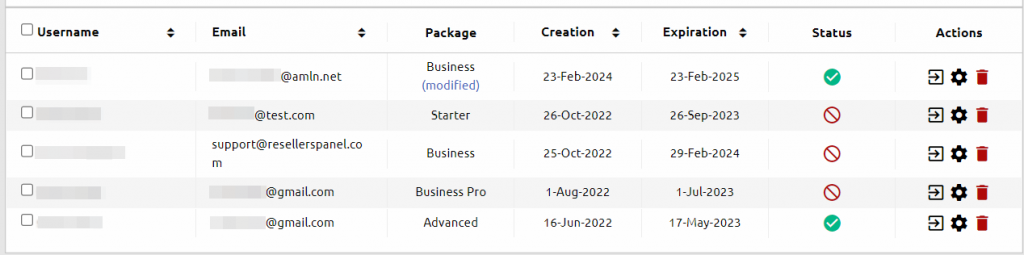
In the “Actions” column on the right, the account owner will be able to log into a particular subaccount, edit its details, or delete it.
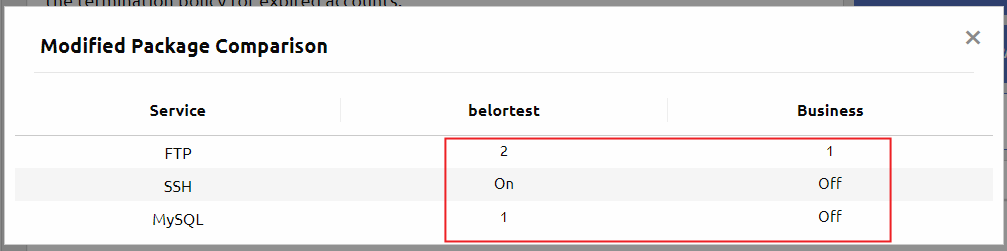
NOTE: If any changes have been made to the web hosting package features for a specific subaccount (client), the package will be labeled as “modified” in the clients’ table (refer to the screenshot provided above). By clicking on the ‘modified’ link, a pop-up modal window will appear, showing a comparison table that outlines the original and modified features of the plan:
Various subaccount management options
Multi-account controls have been added above the table of subaccounts to make managing your clients easier:

Here is a quick overview of the multi-account controls:
An option to send emails from the master account to all subaccount users
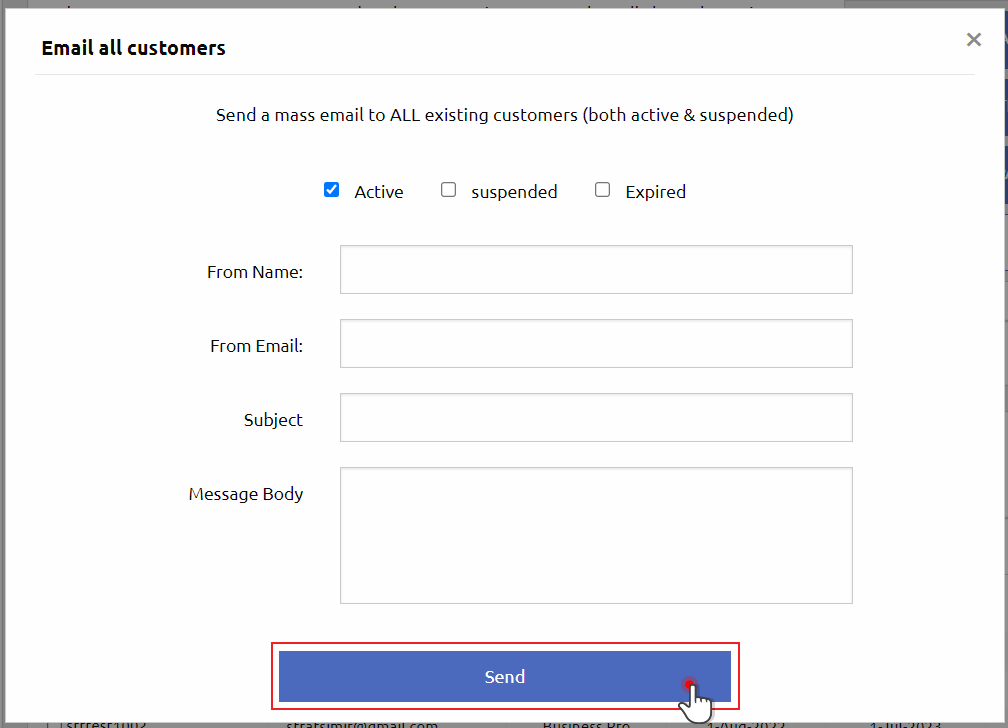
When the account owner clicks on the “Email all customers” option, a modal window will appear. Within this window, the user can select which customers they want to send the email to based on their status.
Additionally, they can provide the necessary details for the email, such as the sender’s name and email address, the subject of the message, and the body of the email.
An option to see all suspended accounts including the reason why they were suspended
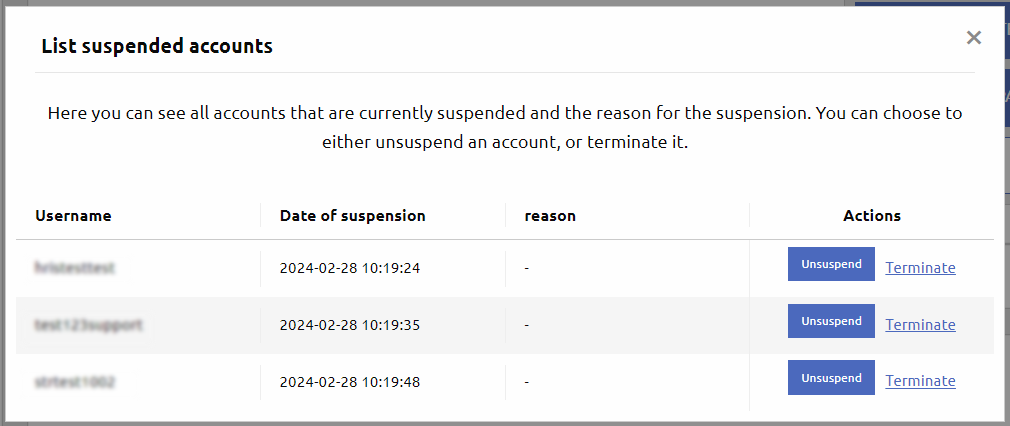
When an account user clicks on the “List Suspended Accounts” link, a modal window will appear showing a list of all the users who have been suspended (if there are any).
The modal window will also display the reason for each account suspension, provided by the account owner (if available).
An option to keep track of resource usage of all subaccounts
By clicking on the “Account Resource Usage” link, users can access a modal window that provides real-time data regarding the usage of essential account resources, including MySQL databases, FTP accounts, VPN traffic, and more:
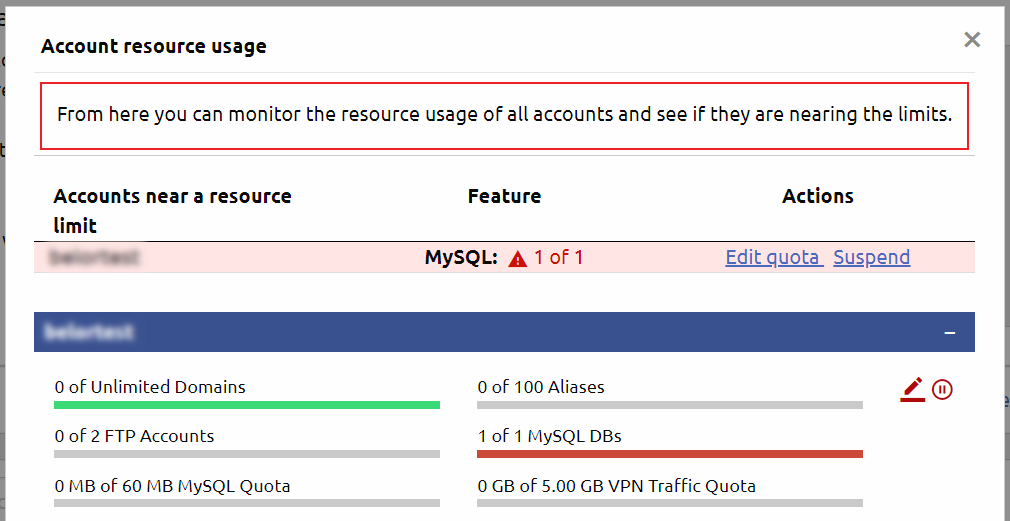
If a particular resource on an account is approaching its limit, the account owner will receive a notification at the top of the window (refer to the screenshot provided above).
There are two ways to address instances of resource overuse in accounts – either by upgrading the account’s package features or by temporarily suspending it.

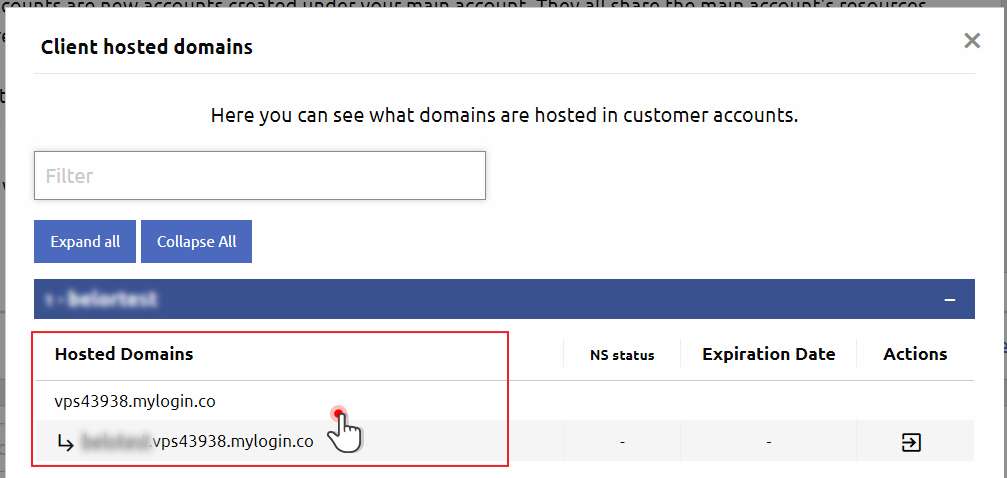
An option to check what domain names are hosted in the clients’ subaccounts
By clicking on the “Clients’ Hosted Domains” link located above the subaccounts table, a modal window will appear.
This window will display a list of domains that are hosted within each client’s account.
Quick subaccount management actions
Right beneath the action links presented above account users will find a few quick subaccount management options that they can apply to multiple accounts at a time. These include:
Suspend – an option to suspend one or more subaccounts at a time featuring a field to specify the reason for suspension:
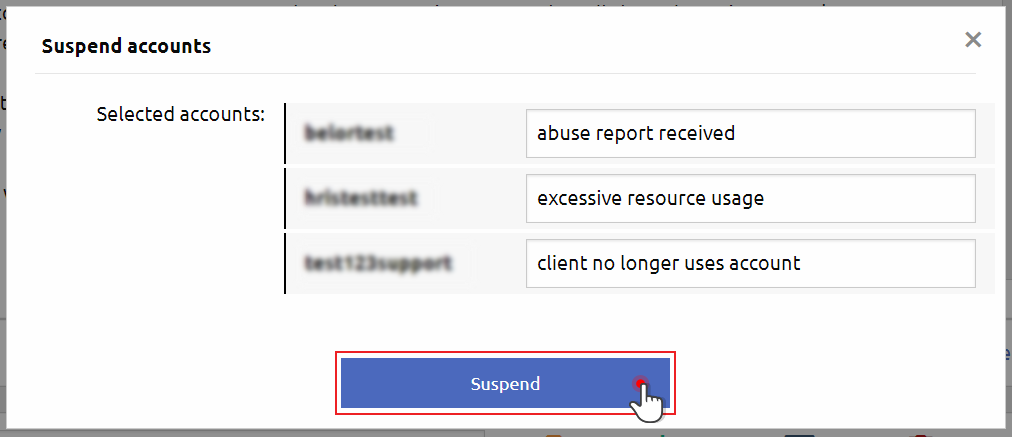
Unsuspend – an option to re-activate subaccounts that have been suspended for some reason
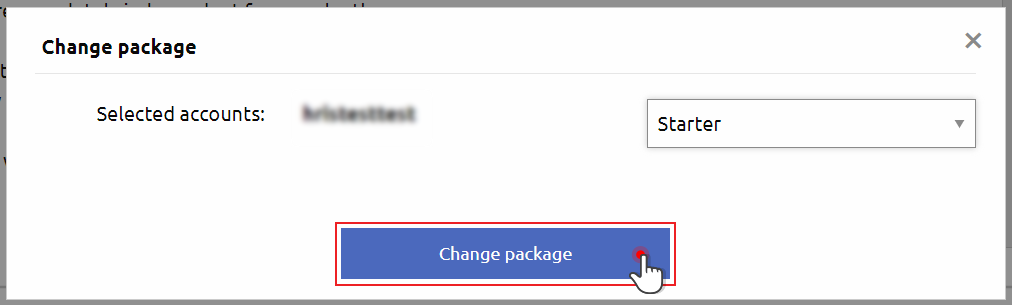
Change package – an option to move a client’s subaccount to another plan in case they need more resources or need to downgrade:
Delete – an option to delete one or multiple accounts with a single action.
What are the benefits of the “Manage Accounts” section?
The upgraded subaccounts section in the Hepsia Control Panel offers VPS and dedicated server users a fresh perspective on traditional server usage. This new feature allows account owners to:
Test the waters with reseller hosting
The revamped section makes it effortless to explore the world of reseller hosting even if you start out by hosting some of your friends’ projects, while figuring out your marketing plan;
Explore new revenue opportunities
Whether your server is primarily used for your DevOps project or a busy online business, you can now leverage spare resources to generate new income;
Minimize server expenses
By monetizing your server resources, you can effectively offset some of your monthly costs and reduce your overall server expenses.
How to make use of the “Manage Accounts” functionality for your reseller hosting business?
The subaccounts section is accessible to all users of Hepsia Control Panel-installed OpenVZ, KVM or dedicated servers.
The following are two main ways you can leverage this option for your reseller hosting business:
- You can sign up for any of our server solutions directly from our website at a discounted price. From there, you can utilize the interface to create web hosting packages and assign them to your own customers. It will be your responsibility to handle billing and support services;
- Alternatively, if you haven’t already done so, you can become a hosting reseller via our Free Reseller program. Through this program, you can offer VPS and dedicated servers with a “Manage Accounts” capability to your customers (it is available only for Hepsia Control Panel-installed servers). We will handle all billing and customer support operations on your behalf.