
A mail blacklist filtering option added to the Email Manager
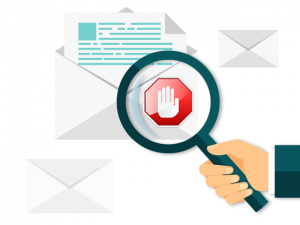
Email security continues to be a great source of concern, as spammers get smarter in their strife to get hold of your mailbox. To help boost the resistance of our mail servers to the latest spamming techniques, we have made a considerable upgrade to our spam protection system.
Now all your mailboxes are shielded by an advanced blacklist filtering technology, which uses the latest mail server verification methods and which relies on reputable blacklist and greylist database sources.
Also, you and your customers will be able to enable/disable the mail blacklist filtering option from the Web Hosting Control Panel.
How does mail blacklist filtering work?
A blacklist, also known as DNSBL (DNS Blacklist), is a real-time anti-spam database, which tracks blacklisted IP addresses, i.e. IP addresses of mail servers that have been reported for spamming activities.
In contrast to the regular anti-spam protection where emails are filtered out when reaching your mailbox, a mail blacklist filter will block malicious emails before they even reach the recipient.
To verify if an email is coming from a blacklisted IP address, we now use a large reputable database, which includes a range of well-trusted DNS-based blacklists, greylists and additional spam lists. When the mail server receives an incoming email, the sender’s IP address is matched against the IPs listed in the database we are working with.
If the sender’s IP is listed on even one of the blacklists, the email coming from it will not be delivered to your mailbox. Thanks to the advanced real-time verification process, the target mail server, i.e. our mail server, will refuse to accept the message and will even block the initial network connection from the blacklisted address.
This way, it will be impossible for the blacklisted outgoing mail server to deliver the email to our mail server and your inbox will be fully safe from potentially malicious emails.
How to enable/disable the mail blacklist filtering option?
From the Web Hosting Control Panel, you can now enable/disable the newly improved mail blacklist filtering functionality on our mail servers with a click of the mouse.
In the Email Manager, just navigate to the Blacklists column and find the mailbox you want to enable/disable the blacklist filtering option for.
By default, the blacklist filtering option is enabled for all email accounts. If you want to disable it for a certain mailbox because you are sure that you only receive legitimate emails from trusted sources, then simply click on the green Blacklist icon:

If you want to later re-activate the blacklist filtering option, simply click on the red Blacklist icon.

—
Our newly refined mail blacklist filtering system guarantees better inbound spam protection and gives you and your customers another good reason to feel safe & sound on our web hosting platform.
Originally published Friday, June 19th, 2015 at 5:11 pm, updated June 22, 2015 and is filed under Web Hosting Platform, Hepsia Control Panel.Tags: web hosting control panel, email manager, anti-spam protection